Macarons!
Macarons! Macarons! Well where do you start with macarons? Well for one thing, macarons
are not macaroons. I have found myself in this particular conversation on
numerous occasions. The macarons that I am referring to in this blog, originated
in France and are technically confectionary due to their high sugar content. Macaroons,
on the other hand, are a coconut based biscuit, usually dipped in chocolate and
have been around in Australia a lot longer than the French macaron. The macaron
has become a lot more popular in Australia recently, largely to do with the
publicity on Masterchef and the Australian king of the macaron, Adriano Zumbo.
 |
| Macaroon |
 |
| Macaron |
I
love cooking macarons. I love the fantastic colours that you can make and
watching them slowly rise in the oven with their crinkly feet. I love how you
can basically make them any flavour that you can dream of, like some of Zumbo’s
crazy flavours. To be honest I love the process of making them as much as I love eating the end result!
When
it comes to making macarons, there are two main methods: The Italian method and
the French method. The ‘nationalities’ of each of these methods refers to the
kind of meringue that is used in the recipe. The French method of making meringue
is the most common and is simply the raining of castor sugar over the egg whites
while beating at high speed. This is the simpler way although the meringue is
not as stable as in the Italian method. In the Italian method, the sugar is heated
up to ‘soft ball’ stage (118˚C) and then poured into the egg whites while
beating at high speed. This process cooks the egg whites and leaves you with a
more stable meringue, which is less susceptible to over mixing. I have tried many macaron recipes, using both
methods, and I have definitely found the Italian method to be much more
reliable.
Most
recipes call for ‘aged’ egg whites. This means you separate the eggs the day
before and cover the egg whites and leave them in the fridge for 24-48 hours.
This is not 100% necessary but it is helpful as it gives the egg whites more
elasticity. I don’t always use aged egg whites but if I have planned ahead, or
if the macarons are for something important, I will separate the eggs the day
before. It is important to ensure that the egg whites are at room temperature before
using them.
There
are many things that will affect the making of macarons but probably the
biggest thing is the weather. Simply, the drier the air, the better the
macarons will be and the faster they will set. An air-conditioner is a must if
you are attempting macarons on a humid day.
I’m
sure that there are some of you know who are reading this and thinking “I could
never make macarons”. However, I am going to take you through it step by step
and show you my method of making macarons and hopefully you will all be able to
make them. It does take time (and patience), so it is not something that can be
rushed.
After
reading and trialling recipe after recipe, I have come up with a recipe that
seems to consistently work well for me, so hopefully it will work well for you
too! This is the recipe I used when making the macaron tower for my sister’s
birthday.
The
recipe that I have for you today is for my Jaffa macarons. These are by far my
favourites (and not just because they are orange)! This recipe can be altered
quite easily by substituting the orange flavouring/colouring for another
flavour or colour. Some recipes suggest that you can make different flavours
and colours by halving the ingredients and colouring/flavouring each portion as
you fold them together. Personally, I find it easier to work with a smaller mix
when it comes to making macarons, so for the tower I made this recipe 6 times,
rather than trying to combine them.

Some
equipment you will find useful for this recipe:
Kitchen
stand mixer
Candy
thermometer
A
small saucepan
Pastry
brush
Piping
bags and nozzles
Mixing
bowls
Biscuit
oven trays or baking sheets
JAFFA MACARONS
Makes
approximately 40 filled 3cm macarons
Ingredients:
100g
egg whites at room temperature(approximately 3 eggs)
125g
castor sugar
2tbs
water
125g
icing sugar (not icing mixture)
 125g
almond meal
125g
almond meal1tsp orange essence (can be varied to suit taste)
½
tsp Gel Food colouring (can be varied depending on desired colour of macaron)
1.
Divide the egg whites into two 50 g portions. One in a small bowl and the other
in the bowl of your mixer.
2.
Add 1 tsp of orange essence and ½ tsp of gel food colouring into the egg white
in the small bowl and mix together with a fork until completely combined. Set aside.

3.
Place almond meal in a large mixing bowl and sift in icing sugar. Use your
fingertips to rub almond meal and icing sugar together until completely
combined. Set aside

4.
Make Italian Meringue:
1. Place castor sugar
and water in a small saucepan and place on a medium-high heat. Stir briefly to
combine but do not stir again after this, as you risk sugar crystals forming.

 2. Begin to whip egg
whites on high (with the wire whisk attachment if your mixer has one), so that
they will be stiff by the time the sugar is ready.
2. Begin to whip egg
whites on high (with the wire whisk attachment if your mixer has one), so that
they will be stiff by the time the sugar is ready. 
3. As the temperature
of the sugar gets higher, bubbles will form and burst on the side of the pot.
Use a pastry brush and water to wash down the side of the pot. This will stop
any sugar crystals forming and falling back into the sugar mixture.
4. Use a candy
thermometer to check the temperature of the sugar. It will only take about 3-4
minutes to reach 118˚C (soft ball stage)
5. Once sugar reaches 118˚C,
remove from heat immediately and pour in a slow steady stream down the side of
the mixer bowl, while it is still running on high.


6. Continue to whip on
high until the outside of the bowl is no longer hot to touch.
7. The finished
meringue should be very thick and glossy.
5.
Pour the egg white and colouring mixture over the top of the almond meal and
icing sugar mixture.
6.
Add approximately 1/3 of the meringue (I find that is usually what is left on
the wire whisk from the mixer) and mix thoroughly. Do not be gentle at this point,
as it is really important that you get it all fully incorporated before you
begin to fold the rest of the meringue.

7.
Fold in half the remaining meringue using a large metal spoon and when almost
fully mixed in add the last of the meringue. Go slowly at this stage and ensure
that you get right to the bottom of the mixing bowl. When fully mixed, there
should be no marbling of the meringue through the mixture. The finished mixture
will be very thick and it will ooze slowly off the spoon when lifted away from
the bowl. If the batter is too runny it may have been over mixed.
 | ||||
| Under-mixed |
 |
| Well mixed |
8.
Piping- I like to print out a ‘macaron template’ of 3cm circles to help me to
get a consistent size.

You
can now buy disposable piping bags at most supermarkets. I much prefer these to
washing and drying a re-usable piping bag and nozzle.

1.
Fit the nozzle according to the instructions on the box. I cut the plain nozzle
to give it a wider opening and allow the mixture to flow easier.

 2.
Hold the bag around the opening while you spoon in the mixture (this will help
the bag to keep its shape). Don’t put too much mixture into the bag at once. It
is easier to use the piping bag with a smaller amount of mixture in it.
2.
Hold the bag around the opening while you spoon in the mixture (this will help
the bag to keep its shape). Don’t put too much mixture into the bag at once. It
is easier to use the piping bag with a smaller amount of mixture in it.
3.
Roll the excess bag up and holding it in your right hand (if you’re right
handed) twist the bag a couple of times to close it.
4.
Put your macaron template on a hard place mat or chopping board and place the
baking paper on top of the template.
5.
Using your right hand to squeeze the bag, pipe circles by placing the nozzle in
the centre of the circle and squeezing the bag with your right hand. There is
no need to move the bag/nozzle in circles. To stop the flow, stop squeezing the
bag and sharply lift the bag upwards.


6.
After you have piped the whole tray, hold the edges of the placemat or board and
the baking paper and bang it firmly on the bench. This gets rid of any air
bubbles in the macarons and also smooths over the top.

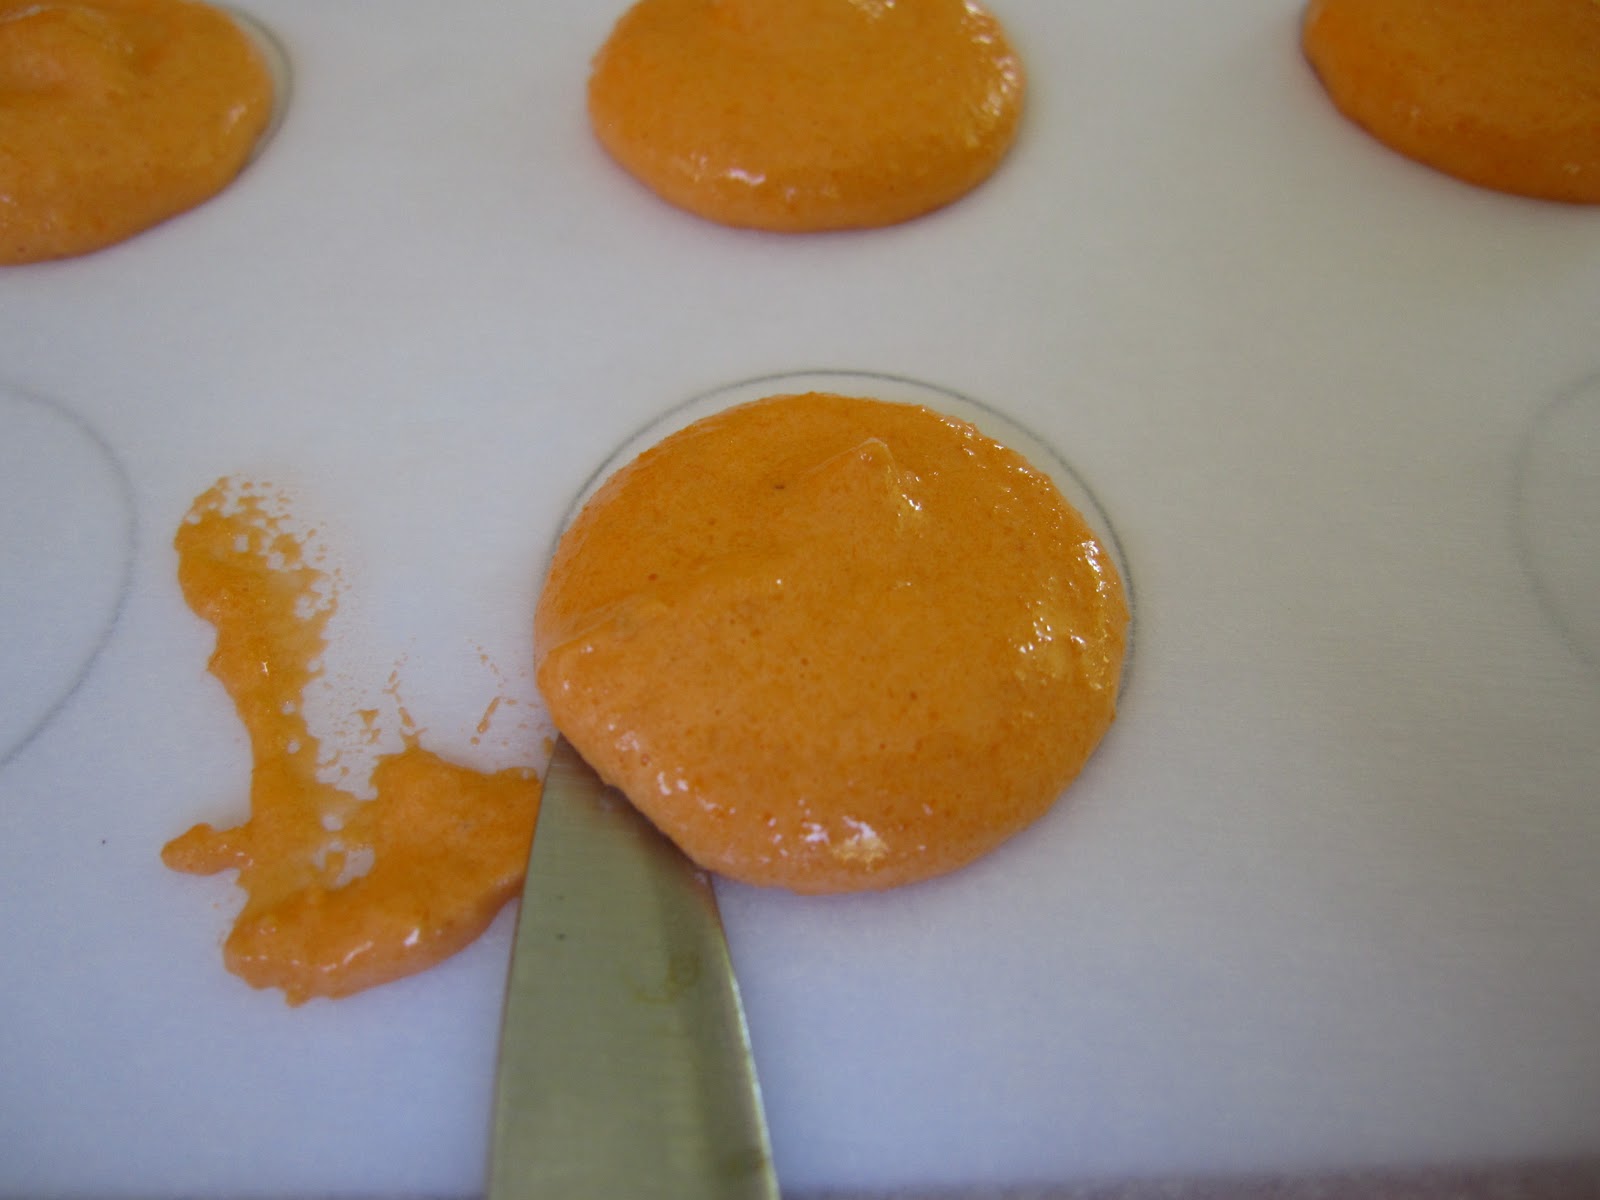
7.
If you accidently make a mess when piping, you can use a small, sharp knife to
clean around the edges of the macaron to help it to rise evenly when cooking.
8.
Gently slide the baking paper off of the board and onto the bench to leave to
set.
9.
Macarons must be completely set prior to baking. This is possibly the most important
part in making macarons. They need to form a dry crust over the entire surface.
If the crust does not completely form, you will find that the macarons will
crack, rather than rise, during baking. Depending on the weather (as I mentioned
earlier), macarons can take anywhere from 30 minutes to a couple of hours to
set. When I made this batch, it was 31˚ and quite humid so I had the air conditioner
on. They took about an hour to set.
To
check that your macarons are ready to bake, gently touch the surface with your
fingertip. If you can do this without it sticking, they are ready to bake!

10.
Preheat oven to 150˚C (fan-forced). Gently, slide the baking paper onto a baking
tray and place in the lower half of the oven. They will take 15-18 minutes to
cook. Only cook one tray at a time. You should see your macarons beginning to rise after about 2-3 minutes of cooking.

11.
To check if your macarons are cooked, you should be able to lift them from the
baking paper without leaving any residue. Ideally, you don’t want them to brown
on the top.

12.
Once removed from the oven, place macarons on a wire rack to cool.
FILLING:
Choc-orange ganache
Ingredients:
200g
dark chocolate
150ml
thickened cream
Zest
of one orange
1tsp
orange essence
40g
unsalted butter
1.
chop chocolate into small pieces and place in a heat proof bowl

2. Remove the zest of one orange and chop very finely.
3.
Cut butter into small cubes and place in a small saucepan with the cream,
orange zest and orange essence.


3. Bring cream mixture to the boil, stirring constantly (the butter will melt into the cream)
4. Once boiling, remove from heat and, while stirring the chocolate, pour the boiled cream over the chocolate.

5. Continue to stir the chocolate vigorously until it is smooth and all of the chocolate pieces are melted.
6. Chill ganache in the fridge or freezer, stirring frequently.


 Using
the star nozzle on a piping bag, pipe a flat rosette onto each base and
sandwich together with the lid.
Using
the star nozzle on a piping bag, pipe a flat rosette onto each base and
sandwich together with the lid.
Unfilled
shells can be stored in an air-tight container and kept in the cupboard for up
to a week, or frozen for later use. If freezing macaron shells, defrost them in
the refrigerator overnight.
And
there you have it! My recipe for Jaffa Macarons. This was a very long blog, so
thank you to anyone who made it all the way to the end! I’m hoping that I have
included enough information here for you to feel confident in attempting to
make macarons yourself.
If
you have any questions don’t hesitate to ask and let me know if you try them out
for yourself.
Happy
Macaronning!


